| STEP 1
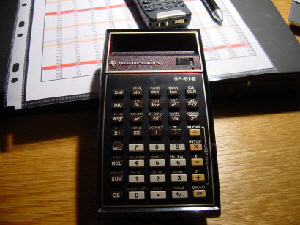
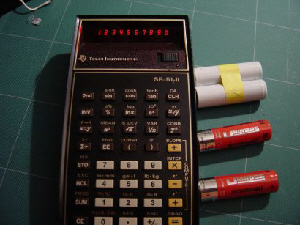
Texas Instruments SR-51 II in need of resuscitation. |
 |
| STEP 2
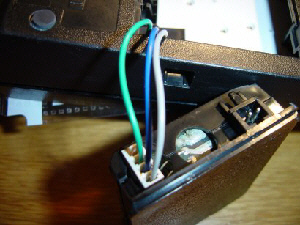
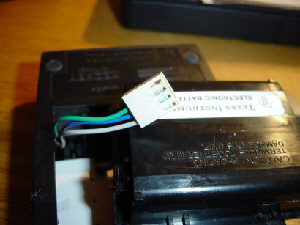
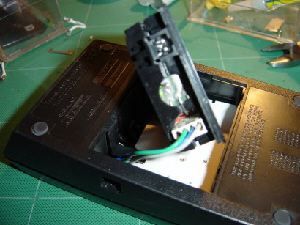
Open up the BP6
battery housing and note the 3-wire connection to the calculator.
Unlike the BP7+
series, voltage regulation is done off-board from the battery pack. |
 |
| STEP 3
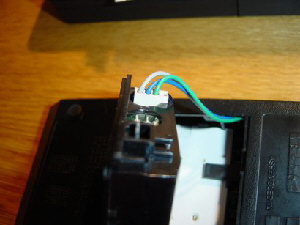
Note the plug orientation
in the housing.
|
 |
| STEP 4
Carefully disconnect
the plug. Mine had corrosion deposits on it so handle with care.
|
 |
| STEP 5
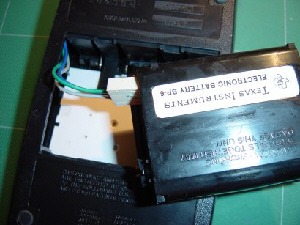
Unless you are
unlucky, there will be no need to remake the plug, but be sure to note
how the plug is relocated in the housing.
|
 |
| STEP 6
Split the shell
open using a craft knife. The PCB locates in one way but note the charging
pins should you decide to attach the charger without using the locating
guide of the case.
|
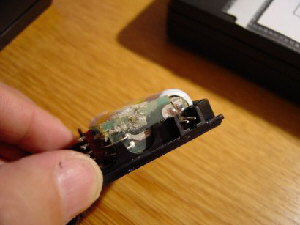 |
| STEP 7
Remove the old
batteries. Handle with care. The corrosion has engulfed the
little PCB as well. TOXIC!
|
 |
|
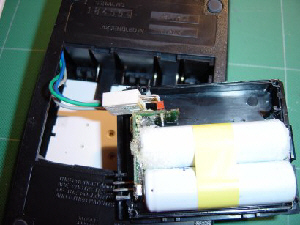
| STEP 8
This is the two
AA cell arrangement in the shell. Your replacement batteries should
be NiCd-type rated at 450-800mAh.
|
 |
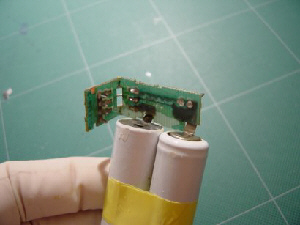
| STEP 9
Clean up the small
PCB. Be careful to note the battery polarity and connection positions
on the PCB.
|
 |
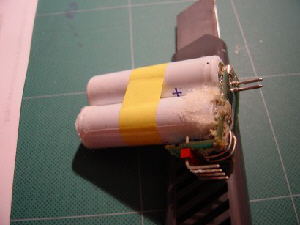
| STEP 10
Create your own two-cell pack if not
available. Be careful when soldering onto the battery terminals. Don't let the batteries
get hot. The ends will need to be scuffed with some emery paper before soldering.
|
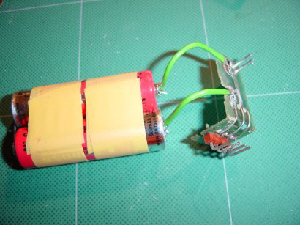 |
| STEP 11
The old insulation
between the battery posts and the PCB was discarded (a horrible bit of
foam rubber) and replaced with a strip of plastic.
|
 |
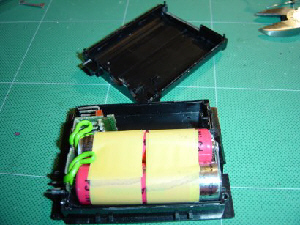
| STEP 12
The battery assembly
just fits the shell, but the paper clip bridge work meant a small cut out
was required in each case half.
|
 |
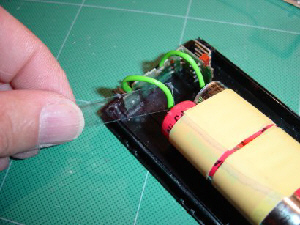
| STEP 13
Re-assemble the
shell halves and glue. Then reconnect the calculator lead (watch
the polarity).
|
 |
| STEP 14
Finally after 7
hours charging, the old machine is back to life again!
IT WORKS !
Pierre, Thanks!
Next time take the right numbers. It is simply SRQ(8). |
 |
|